
The presence of “black triangles” (gingival embrasure spaces) presents both aesthetic and functional challenges in restorative dentistry. Occurring in up to 38% of adults, these dark, triangular voids between adjacent teeth result from loss of interdental papilla, post-orthodontic alignment of triangular teeth, periodontal disease recession, or age-related gingival shrinkage. Beyond the self-consciousness they cause patients, black triangles act as food traps and contribute to plaque accumulation, speech alterations, and localized gingival inflammation.
Historically, treating open embrasures required aggressive tissue reduction for porcelain veneers or full crowns, or tedious hand-layered composite placement that often yielded overhangs, subgingival ledges, and early stain degradation. The introduction of modern injection molding techniques using warmed composite resins and anatomical clear matrices (pioneered largely by systems like Bioclear) has transformed treatment. This approach enables conservative, monolithic, highly aesthetic, and periodontally sound closures.
1. Anatomy and Etiology of Gingival Embrasures
Understanding the biological foundation of the interdental space is crucial before attempting restoration.
Tarnow’s 5 mm Rule: In 1992, Tarnow et al. demonstrated that when the distance from the contact point to the crest of bone is $5\text{ mm}$ or less, the interdental papilla is present almost 100% of the time. When the distance increases to $6\text{ mm}$, complete papilla fill drops to ~56%, and at $7\text{ mm}$, it drops to ~27%. Black triangles form when the distance between the contact area and the bone crest exceeds this critical biological limit.
Atypical Tooth Morphology: Triangular-shaped crown incisors feature high, narrow contact points positioned in the incisal third, leaving expansive cervical spaces.
Orthodontic Uncrowding: Aligning severely crowded anterior teeth often unmasks underlying interdental bone loss or moves previously overlapping contact points incisally.
Periodontal Tissue Loss: Loss of alveolar bone height and soft tissue attachment directly pulls the gingival margin apical to the contact area.
2. Limitations of Traditional Treatment Modalities
| Treatment | Mechanism | Major Limitations |
| Traditional Direct Hand-Layering | Freehand placement of hybrid or microfill composites using flat Mylar strips or metal matrices. | High risk of subgingival overhangs, marginal ditching, sharp ledges, poor polishability, and high rates of plaque retention. |
| Porcelain Veneers / Crowns | Indirect ceramics requiring tooth preparation to alter interproximal contours. | Highly invasive; requires irreversible enamel removal. Ceramic margin placement deep into the sulcus risks chronic inflammation. |
3. Principles of Modern Resin Injection Molding
Anatomical Clear Matrices
Translucent, pre-shaped matrices contoured specifically to mirror the natural emerge curvature of incisors, canines, and premolars. Because they are clear, light curing penetrates efficiently from all directions, and clinicians can visually monitor resin flow to eliminate void formation in real time.
Thermally Viscosity-Modified Composite
Heating universal paste composites to approximately $68^\circ\text{C}$ ($155^\circ\text{F}$) temporarily alters their rheological properties. Viscosity drops significantly, allowing the paste composite to flow smoothly through fine syringes into complex matrix shapes without sacrificing the mechanical strength, wear resistance, and polishability of traditional high-filled pastes.
The “Co-Injection” Technique
A uncured layer of flowable composite is injected into the matrix first, followed immediately by warmed universal paste composite. The denser paste displaces most of the lower-strength flowable resin, leaving a thin, void-free hybrid interfacial layer with high structural density.
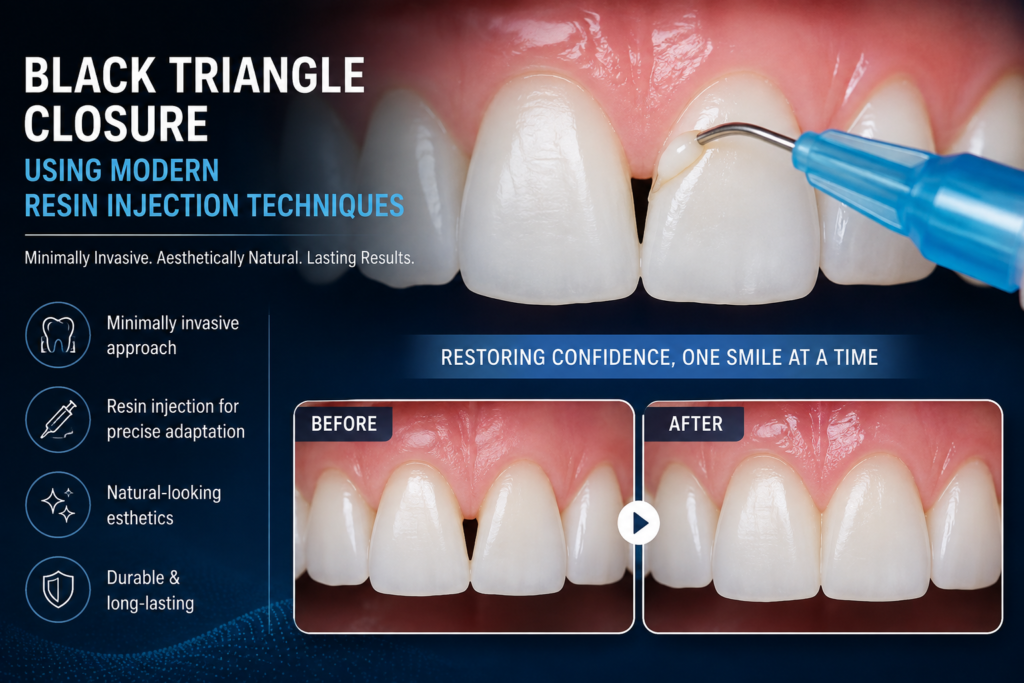
4. Comprehensive Clinical Protocol Step-by-Step
Assess periodontal stability (bleeding on probing must be zero; tissues must be healthy).
Use specialized black triangle color-coded gauges inserted into the open space to select the corresponding matrix curvature (e.g., Small, Medium, Large, or Large-Plus color tabs).
Clean interproximal spaces with un-waxed floss and interdental brushes to verify contact tightness.
Apply a rubber dam for absolute moisture control. Heavy-gauge dams allow superior soft tissue retraction.
Blast with Aluminum Tri-Hydroxide or Sodium Bicarbonate: Micro-particle air polishing ($50\ \mu\text{m}$) is non-negotiable. It removes the invisible proteinaceous biofilm coating the interproximal enamel, which hand instruments and prophy paste routinely miss.
Place the selected pre-curved anatomical matrices interproximally on both adjacent teeth, tucking them approximately $1\text{–}2\text{ mm}$ into the gingival sulcus.
The matrix design creates a smooth transition from the root face to the contact area without requiring traditional hard wooden/plastic wedges that flatten interproximal profiles.
Etch the entire interproximal enamel surface with 37% Phosphoric Acid for 15–20 seconds.
Rinse thoroughly and air-dry gently.
Apply a universal bonding agent generously into the interproximal space and internal walls of the matrices.
Do NOT light-cure the adhesive yet. The uncured adhesive acts as a lubricant/surfactant for the incoming flowable composite.
Inject an uncured, high-radiopaque flowable composite into the deepest cervical region of the matrix.
Immediately insert the tip of the pre-warmed ($68^\circ\text{C}$) universal paste composite directly into the pool of uncured flowable.
Express the paste composite steadily. The denser warmed paste forces the flowable resin out to the margins and fills the matrix volume, preventing air traps.
Wipe away the excess squeezed composite from the matrix margins before curing.
Light-cure from the facial aspect for 20 seconds, lingual aspect for 20 seconds, and incisal aspect for 20 seconds using a high-power LED curing light ($\ge 1200\text{ mW/cm}^2$).
Gently peel away the clear matrices using a dedicated matrix forceps.
Remove marginal flashes using fine-grit diamond burs or coarse flex-discs.
Contour the subgingival emergence using sharp coarse blades or specialized interproximal diamond strips.
Polish to an enamel-like lustre using rubber impregnated points/cups followed by a diamond polishing paste system. The goal is a zero-margin transition that soft tissue can rest against comfortably.
5. Material Science: Viscosity, Composite Heating & Curing Dynamics
Thermal Kinetics
Heating paste composite to $68^\circ\text{C}$ reduces film thickness and extrusion force required by up to 70%. As the composite enters the tooth/matrix environment, it cools down rapidly toward body temperature ($37^\circ\text{C}$) within 10 to 15 seconds. This thermal drop increases its stability, allowing easy carving prior to curing.
Polymerization Shrinkage Stress
Because injection molding fills larger volumes monolithically, clinicians must manage C-Factor (Configuration Factor) stresses:
High-intensity LED units with soft-start curing profiles help minimize stress development at the enamel-composite interface.
Using composite formulations with low volumetric shrinkage ($\le 2.0\%$) and high filler loading ($\ge 75\%$ by weight) prevents marginal gap formation and subsequent microleakage.
6. Periodontal and Tissue Response
Emergence Angle: The angle formed between the root surface and the newly added composite profile must be smooth and gradual ($\le 30^\circ$). Over-contoured profiles compress the interdental papilla, causing ischemic necrosis and chronic inflammation.
Surface Roughness ($R_a$): Enamel has a typical surface roughness ($R_a$) of approximately $0.02\text{–}0.05\ \mu\text{m}$. Composite restorations in subgingival zones must be polished below $0.2\ \mu\text{m}$ to prevent bacterial colonization (Streptococcus mutans and Porphyromonas gingivalis).
Papilla Regeneration: Properly sculpted embrasures provide a rigid scaffold that supports the collateral gingival microvasculature. Over 6–12 months post-treatment, healthy papillae often undergo creeping attachment, filling any remaining micro-gaps.
7. Comparative Assessment
Comparing restorative solutions for interdental black triangles highlights key performance metrics:
| Diagnostic Metric | Traditional Hand-Layered Composite | Porcelain Veneers | Modern Injection Molded Composite |
| Enamel Preparation | Minimal to None | Moderate to Aggressive ($0.3\text{–}0.7\text{ mm}$) | None (100% Additive) |
| Margin Polishability ($R_a$) | Moderate ($0.3\text{–}0.5\ \mu\text{m}$) | High ($0.05\ \mu\text{m}$) | Ultra-High ($0.08\text{–}0.1\ \mu\text{m}$) |
| Monolithic Density | Voids common between layers | Solid ceramic block | Solid void-free resin |
| Repairability | High | Low (Requires replacement) | High (Direct composite bonding) |
| Treatment Cost | Low–Moderate | High | Moderate |
| Gingival Health Outcomes | Variable (Risk of overhangs) | Excellent if margins are supragingival | Excellent (Smooth emergence) |
8. Clinical Pitfalls and Troubleshooting
Bleeding During Bonding:
Cause: Subgingival tissue trauma from aggressive matrix placement or pre-existing mucogingival inflammation.
Solution: Postpone treatment until complete periodontal health is achieved through prophylaxis. Use astringent retraction cords or tissue-management haemostatic agents (e.g., Aluminum Chloride) prior to etching.
Ledges at the Subgingival Margin:
Cause: Matrix selected was too large or not seated deeply enough into the sulcus.
Solution: Always verify matrix seating visually prior to etching. Use fine flame-shaped polishing burs dry at low RPM to blend ledges seamlessly into enamel.
Composite Discoloration Over Time:
Cause: Incomplete removal of surface biofilm prior to bonding or insufficient light-curing depth.
Solution: Ensure complete air-abrasion biofilm removal and use high-output curing lights with verified radiant exitance.